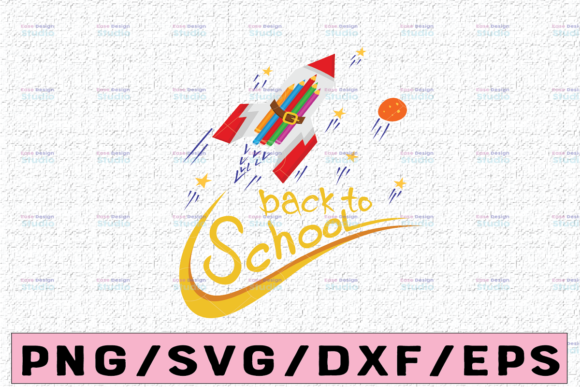
Back to School Rocket Colored Pencils: Essential Tips for Flawless Printing and Crafting
Back-to-school season brings with it a surge of creative energy. Whether you’re an educator personalizing classroom materials, a parent making supply labels, or a small business owner launching a fall product line, having the right design assets makes all the difference. The Back to School Rocket Colored Pencils digital set captures that nostalgic school-supply charm with a playful twist, making it a popular choice for everything from stationery to sublimated t-shirts. Available as an INSTANT DOWNLOAD PNG, this high-resolution 300 DPI file offers a transparent background for ultimate flexibility. However, to get professional-grade results every time, there are a few practical details worth understanding before you start creating. Let’s walk through the common pitfalls and best practices that separate a smooth creative process from a frustrating one.
Understanding What 300 DPI Really Means for Your Project
The term “high-resolution 300 DPI” is frequently listed in product descriptions, but its practical implications are often misunderstood. Dots Per Inch (DPI) measures print density. A 300 DPI image is optimized specifically for physical printing—it contains enough detail to produce sharp lines and vibrant colors on paper, fabric, or hard surfaces.
Why Using Lower Resolution Settings Creates Problems
A common mistake is using an image designed for screen use (typically 72 DPI) for a printed product. If you take a lower-resolution version of the Back to School Rocket Colored Pencils graphic and print it on a mug or a card, the edges of those colored pencil tips will appear soft, blurry, or jagged. This undermines the quality of your final product and can result in wasted blanks or printing costs.
- Always confirm the file properties. Right-click the downloaded PNG, select Properties, then Details. Ensure the vertical and horizontal resolution read 300. Never resize the image to a much larger dimension in your design software; scaling up artificially stretches pixels and destroys sharpness.
- Work from the original file. Make a copy of the high-res PNG and keep the original as a secure backup. If you are designing for social media or a blog post, it is acceptable to export a lower-resolution version for the web, but always keep the master file intact.
Transparent Backgrounds: The Double-Edged Sword
PNG files with transparent backgrounds are beloved for their versatility. You can place the Back to School Rocket Colored Pencils graphic onto any background color—kraft brown, pastel yellow, or deep navy—without an ugly white box surrounding it. This is ideal for layered designs in sublimation, scrapbooking, or card making.
What Transparency Does Not Do
The most frequent oversight is assuming a transparent background prints as white. In standard printing and sublimation, transparency allows the base material (paper, fabric, or hard surface) to show through. If you place the design on a dark shirt, the rocket and pencils will appear on the fabric color, not on a white underbase.
- Inspect the file before use. Open the PNG in your design software (Photoshop, Canva Pro, Affinity Designer, or GIMP). Check that the checkerboard pattern (representing transparency) is genuine and not a masked white layer. Some files mistakenly have an invisible white background that can affect blending modes.
- Plan for white underbases. If your project requires the design to pop on dark materials, you will need to create a white layer manually in your software, or use a printer capable of white ink (common in DTG and some sublimation setups).
Respecting the File Conversion Caveat
When a product description notes that “due to different file conversions, some details in the image may be slightly different or lost,” this is an important signal rather than a flaw. This warning exists because digital files must pass through various color profiles (sRGB, Adobe RGB, CMYK) and software interpreters before they become physical products.
Where Color Shifts and Detail Loss Come From
Your monitor displays colors using backlit RGB light. Most commercial printers use CMYK ink. This fundamental difference often causes vibrant on-screen turquoise to print slightly duller or greener than expected. Fine lines in the rocket design or the colored pencil details may also appear slightly thinner or thicker depending on the printer’s dot gain.
- Never skip the test print. Print a single sample before committing to a bulk order. A test card, one mug, or one transfer sheet will reveal how the Back to School Rocket Colored Pencils graphic behaves on your specific equipment.
- Calibrate your monitor. Basic monitor calibration tools or software can align what you see on screen more closely with what prints. If you rely on a print-on-demand service, request a physical proof or use their online color calibration guides.
- Handle details with care. Because some fine detail might shift, avoid over-manipulating the file with excessive filters or aggressive resizing. The original PNG has been optimized for quality; let it carry the weight of the design.
Choosing the Right Medium for the Rocket Design
The Back to School Rocket Colored Pencils PNG is marketed for a wide range of products: cards, framed prints, shirts, coffee mugs, pillows, wall art, stationery, waterslide decals, and sublimation blanks. While this versatility is a strength, not every application is identical in execution.
Scaling Realities for Wall Art and Large Surfaces
Since this is a PNG (raster) file rather than a vector SVG, it has a finite resolution. Scaling up too aggressively for a large poster or wall art will introduce pixelation. For high-quality results, keep the printed size within the file’s native limits. Typically, a high-resolution 300 DPI PNG is crisp at sizes up to 8x10 or 11x14 inches. For larger pieces, you may want to position it as an accent element rather than the full canvas.
The Mirroring Step That Saves the Day
If you are using this design for sublimation or waterslide transfers, you must mirror (flip horizontally) the image before printing. This is one of the most commonly skipped steps in crafting. A non-mirrored image will transfer backwards onto your shirt or mug, ruining the design.
Cutting Guides for Waterslide Projects
For waterslide decal applications, the transparent background is useful, but you need to cut closely around the rocket and pencils. The PNG does not include a cut line, so you will either cut by hand with fine detail scissors or use your cutting machine’s “print and cut” feature (such as Cricut Print Then Cut or Silhouette PixScan) to create a precise offset border. Leaving too much transparent film around the design can make the decal look messy on glass or ceramic.
- Create a project checklist: Design mockup, check scaling, mirror image (if applicable), print test, final print. This systematic approach catches mistakes early.
- Label your files clearly. Save a separate “for sublimation” version of the Back to School Rocket Colored Pencils PNG that is already mirrored, and a “for standard print” version that is not. This prevents confusion later.
Commercial Use: Respecting the License Terms
Instant download digital files are purchased with specific usage rights. Most standard licenses allow you to use the Back to School Rocket Colored Pencils PNG for creating physical products you intend to sell. This covers t-shirts, mugs, cards, and stationery produced in small batches. It also allows use in classrooms or for personal projects.
What Most Licenses Do Not Allow
A critical mistake is assuming you can resell the digital file itself. You cannot bundle this PNG into a “Back to School Mega Pack” and sell it to other creators. This violates the terms of almost all standard commercial licenses and undermines the original designer’s work.
- Read the licensing agreement. It is usually provided in the download folder or linked on the product page. Look for key phrases like “use for physical products” and “no redistribution of digital files.”
- Apply the license to your business model. If you are a small business owner using print-on-demand, you are perfectly within your rights. Just ensure your customer files do not include the raw PNG for them to reuse.
Practical File Management for Long-Term Success
Digital assets are only useful if you can find them when you need them. Many creators download the Back to School Rocket Colored Pencils PNG, use it once, and then lose it in a cluttered desktop folder. This costs time and money if you need to recreate a product later.
Building a Simple Organizational System
Create a dedicated folder structure on your computer or cloud storage. For example: Digital Assets > Back to School > Rocket Pencils > Original Files. Within this folder, store the high-res PNG and any edited versions with clear, descriptive names.
- Use consistent naming conventions: “rocket-pencils-bts-highres.png” is searchable and clear. Avoid non-descriptive names like “finalfinal.png”.
- Back up your assets. Cloud storage (Google Drive, Dropbox, iCloud) plus an external hard drive provides redundancy. Losing a purchased digital file is frustrating and avoidable.
- Tag your products. If you use design software like Canva or Photoshop, add tags to your assets for quick retrieval. Keywords like “school,” “rocket,” “pencils,” and “sublimation” will save time during busy seasons.
Final Thoughts for Confident Creating
The Back to School Rocket Colored Pencils instant download PNG offers serious potential for beautiful, personalized products. By understanding the practical realities of 300 DPI print resolution, managing transparent backgrounds wisely, accounting for color shifts in file conversion, and respecting scaling limitations, you position yourself for consistently professional results. Test your prints, organize your files, and respect the licensing terms. These simple habits allow you to focus on what matters most—making creative projects that look great and function exactly as intended.