Back to School Ornament Style Bubble: A Practical Guide to Getting It Right the First Time
If you have stumbled across the Back to School Ornament Style Bubble design set, you are likely already thinking about how to create something memorable for the new school year. Whether you are a small business owner looking to offer custom keepsakes, a teacher preparing classroom gifts, or a parent wanting to make a personalized ornament for your child’s backpack or desk, these digital files offer a fantastic starting point. But like any creative tool, understanding what you are actually working with—and where people commonly go wrong—can save you time, frustration, and wasted materials.
Let us walk through what this design set includes, why it deserves a spot in your creative toolkit, and how to avoid the pitfalls that trip up even experienced makers.
What Is the Back to School Ornament Style Bubble Design Set?
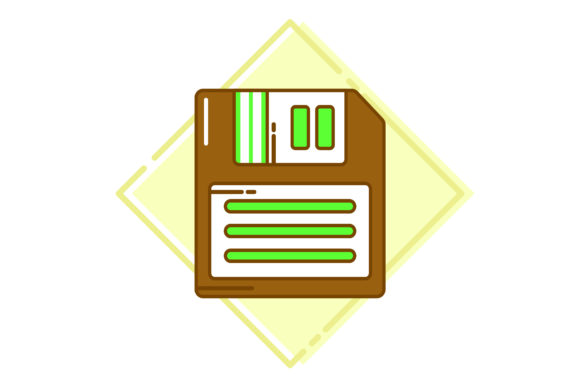
This is a collection of six digital files designed around a playful, bubble-style ornament shape that works beautifully for back-to-school themes. The canvas size is 1920 by 1280 pixels, which gives you plenty of resolution for both print and screen use. You receive the design in AI, EPS, SVG, DXF, JPG, and PNG formats. That means whether you work in Adobe Illustrator, use a cutting machine like Cricut or Silhouette, or simply need a clean JPG for quick printing, there is a file ready for you.
The ornament style itself is what makes this set stand out. Instead of a flat, generic shape, the bubble design adds a three-dimensional feel that works well on physical ornaments, stickers, tags, and even digital scrapbooking layouts. The back-to-school theme can include icons like pencils, apples, books, or chalkboards—depending on how you customize the files. The files are fully editable, so you are not stuck with someone else’s vision.
Why People Are Turning to Digital Design Files Like This One
Customization is the name of the game today. Consumers no longer want mass-produced items that look like everyone else’s. A personalized ornament for a teacher, a custom label for a lunchbox, or a unique sticker for a laptop case all carry more meaning. For creators and small business owners, this shift represents a real opportunity. But it also means you need design assets that are flexible enough to adapt to different projects and easy enough to use that you are not spending hours wrestling with software.
The Back to School Ornament Style Bubble set fits that need. The multiple file formats make it accessible whether you are a professional graphic designer or someone just learning to use a cutting machine. But there are common mistakes that can turn a promising project into a frustrating experience.
Common Mistake #1: Choosing the Wrong File Format for Your Project
The most frequent error people make with digital design bundles is grabbing the first file they see and trying to force it into a tool that does not support it. By the time you have the full set of six formats, each one serves a different purpose. A JPG is great for quick reference or previews, but it will not cut properly in a machine that needs vector paths. An SVG or DXF file is what you want for most cutting machines, while AI and EPS give you full editing control in Adobe software.
I have watched people open an SVG in a raster-based program like Photoshop and wonder why their cuts come out jagged. Or they try to edit a JPG in Illustrator and complain that the layers are flattened. These issues are avoidable. Check your software and your output method before you choose a file. If you are cutting vinyl for a classroom ornament project, use the SVG or DXF. If you are printing stickers on a home printer, the PNG with a transparent background is your best friend.
Common Mistake #2: Ignoring the Canvas Size and Resolution
The design files come with a canvas size of 1920 by 1280 pixels. That is a specific aspect ratio, and it matters. Some users open the file, see the dimensions, and immediately try to scale it up or down without considering the consequences. If you scale a raster file like JPG or PNG up too much, you end up with pixelation. If you scale a vector file like AI or SVG without maintaining proportions, your ornament shape can warp.
Before you start editing, decide what your final output will be. If you are making a 3-inch ornament, you can scale down the vector files easily. If you need a large poster, the JPG at 1920 by 1280 pixels will only give you about 6.4 by 4.3 inches at 300 DPI. That is fine for small prints but not for a banner. Plan your project dimensions before you open the file, and always work from the vector formats when you need to scale up significantly.
Common Mistake #3: Overlooking Editing Capabilities in Free Software
Not everyone owns Adobe Creative Cloud, and that is perfectly fine. But many free or low-cost programs can handle these files if you choose the right format. For example, Inkscape works beautifully with SVG files, and you can edit paths, change colors, and add text. The free version of Silhouette Studio imports DXF files, while Cricut Design Space handles SVG natively. Yet I often see people download the AI file, realize they cannot open it without Illustrator, and then assume the entire set is unusable.
The bundle includes six formats for exactly this reason. If you do not have Illustrator, use the SVG. If you need a file for a laser cutter, the DXF is usually the best option. Do not let one inaccessible format stop you. And if you are unsure, the PNG gives you a transparent-background image that you can still use for basic print projects or as a reference for tracing.
Common Mistake #4: Forgetting to Check Licensing for Commercial Use
This is a bigger issue than most beginners realize. When you purchase a digital design file, the license determines what you can do with it. Some sets allow unlimited commercial use, meaning you can sell products made from the design. Others restrict you to personal projects only. The Back to School Ornament Style Bubble set does not automatically grant blanket commercial rights unless the seller specifies that. You need to read the product description and any included license file carefully.
I have seen small business owners use a design on hundreds of products, only to receive a cease-and-desist because the license only covered personal use. That is a costly mistake. If you plan to sell ornaments, stickers, or digital downloads based on this design, confirm the license terms first. If the listing is unclear, message the seller. It is better to ask upfront than to build a product line on shaky ground.
Common Mistake #5: Using the Ornament Design Without Customization
The whole point of buying editable digital files is to make them your own. Yet some people download the set, use the ornament shape as-is, and wonder why their products do not stand out. The design is a starting point, not a finished product. Add a student’s name, a school year, a favorite subject, or a personal message. Change the colors to match school spirit wear. Swap out generic icons for something that reflects the child’s interests.
A plain bubble ornament with a generic back-to-school graphic is pleasant but forgettable. One that says “Emma’s First Day of Kindergarten – 2025” with a custom color scheme becomes a keepsake. The difference between a product that sells and one that sits on a shelf is often just that extra layer of personalization.
What to Check Before You Start Your Project
Before you open any file, take ten minutes to do a quick prep check. Confirm that your software supports the format you plan to use. Verify that your canvas size matches your intended output dimensions. Read the license terms if you are creating items for sale. Make sure you have the fonts or additional graphics you want to add. And test a small version of your design on a practice material before you commit to your final product.
This last step is often skipped, especially by people who are excited to see the finished result. But a test run can reveal alignment issues, color mismatches, or scaling problems before they ruin your best materials. Cutting a single test ornament out of scrap paper or cardstock takes under a minute and can save you from wasting a sheet of expensive adhesive vinyl or specialty paper.
Making the Most of Multiple File Formats
One of the strengths of this design set is that you get both vector and raster files. That gives you flexibility across different workflows. Use the AI or EPS file if you want to do deep editing in professional software. Use the SVG for cutting machines or web graphics. Use the DXF for laser engraving or CNC routers. Use the JPG for quick mockups or social media posts. Use the PNG with transparency for layering into other designs or for print projects where you do not want a white background.
If you are new to working with multiple formats, start with the SVG. It strikes the best balance between editability and compatibility. Most modern design programs can open SVG files, and you can scale them infinitely without losing quality. Once you are comfortable, explore the other formats and see what each one offers for your specific projects.
Practical Ways to Use This Design
Think beyond the obvious. Yes, the ornament shape works beautifully as a physical Christmas tree ornament for a teacher or student. But it can also become a magnet for a locker, a charm for a backpack zipper, a decorative tag for a gift bag, a sticker for a water bottle, or a digital element in a scrapbook page. Small business owners can use it as a template for custom orders, offering variations in color, text, and size. Teachers can create a class set of ornaments as end-of-year gifts. Hobbyists can make personalized items for their own children or grandchildren.
The bubble style itself lends a polished, dimensional look that feels modern without being overly trendy. It has staying power. A well-designed ornament from this set could be something a family pulls out year after year and remembers a specific school year by.
Final Thoughts on Getting It Right
The Back to School Ornament Style Bubble design set is a versatile tool that can serve a wide range of creative and commercial needs. But like any tool, its value depends on how you use it. Choose the right file format for your project, respect the canvas dimensions and resolution, confirm your software compatibility, check your license, and always add your own creative touch. These few steps separate a project that feels generic from one that feels intentional and personalized.
Whether you are creating for yourself, your classroom, or your customers, the goal is to produce something that looks good, works correctly, and brings a little joy to someone’s back-to-school experience. With the right preparation and a clear understanding of what these files can do, you are well on your way.